After the children on placement came inside from outside play, we would often sit on the mat and read a story to slow down before having afternoon tea. On day, we decided to A House For Wombats by Jane Burrell and Michael Dugan. I went through a book orientation as we discussed in EDLA this semester, going over the title, the front image and the author's name when I turned the book and...
THERE WAS NO BLURB!
...and the children in the room immediately noticed. We read through the book, which wasn't too bad, and talked about what happened in the story and what it meant when one child put their hand up and asked if we could write a blurb for the book. So I said yes!
We talked about what was important in the book and came up a list in which the children basically told me absolutely everything which happened in the story. After talking about how the blurb only tells the reader some of story, we whittled down the list after carefully considering each point and how important it was to the story and came up with the following list:
" she makes a house
the house changes
the house has stairs
the houses are different
the wombats fix the house
the wombats sleep
they sit on the couch
they had a cup of tea "
We were all happy with the final list and decided to print it out and sticky tape the list onto the back of the book so that future readers could read a blurb when they chose to read this book.
Inspired by this pin, I planned this activity during my full control period. Preparation included cutting out the pieces of paper and writing the children's names, adding a heading to the page and gathering your glue, scissors and permanent marker.
I sat the children down and began by talking about our other graphs and what we measured on them and what we were going to measure on the new graph. I placed the names on the ground and asked the children to come out one by one and see which one belonged to them.
They then stood out the front and counted the letters in their own name. I then cut out the individual letters and the children all called out what letter I should glue up.
After gluing the letters on, there was some discussion about who had the most letters and who had the least. We also compared whose names had the same amount and the same letters.
At the end, we counted up the letters in everyone's names and I wrote it in marker down the right hand side. After drawing in the grid lines, labeling the axis and underlining the heading, the final product was ready to be tacked onto the door with our other graphs...
This activity incorporated so many concepts including:
graphing
spelling
counting
information representation
word recognition
number recognition
comparison and contrast
Definitely one to try out again, perhaps with a little tweaking for the primary placement...
The children in the kinder room love to write. Some have mastered their names already and write it on every piece of paper they can get their hands on while some of them are still experimenting with what letters they can trace, draw and recognise.
In knowing this, my AT and I have been doing everything we can think of to support this current interest of theirs. When choosing the order to wash hands, put on jackets, get place mats etc. we draw a letter or a name on the board. Some children knew their names and others while others had more fun sorting out the false names from the real ones. During my full control week, I asked the children what their favourite letters were and why for their morning minutes questions and I received some very thoughtful and insightful answers.
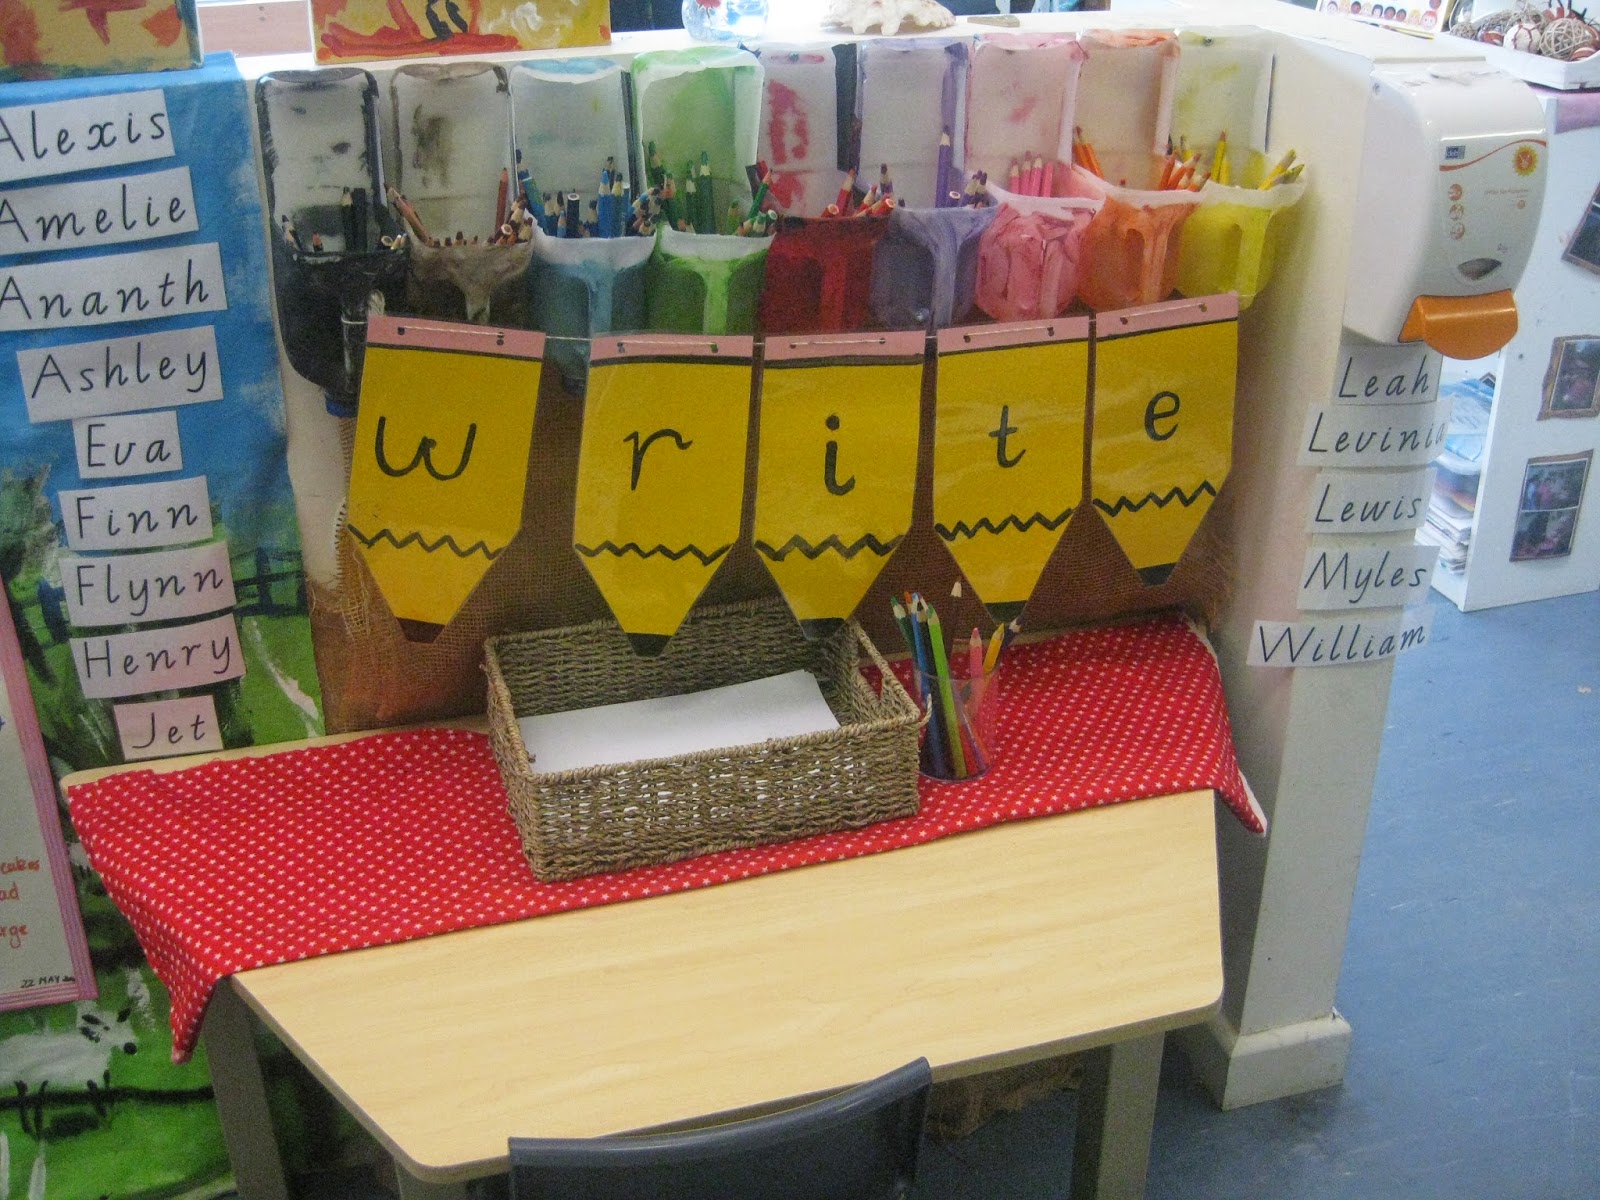
When it came time to change one of the activity tables, I had the perfect idea; a writing table!
I got the idea for the banner from here but cut out yellow and pink paper instead and painted on the letters. After laminating, I used a hole punch to punch holes (duh) and strung it up using twine. I had to redo some pencils so that they could match so for your convenience and found at the bottom of the post, I have made a template that you can print out and either write, type or paint the letters onto. The milk carton pencil holders were my AT's idea and sorts out the pencils by colour. After placing the banner up, setting out a tablecloth and some paper in a natural tray, I set to work on the most important part, the names!
The Victorian Modern Cursive Script font is the best tool you could have installed on your computer. It is the font used in Victoria to teach handwriting and to create handouts, posters, practice sheets...you name it, you can type it with this font! I used the holy grail of fonts to type out the children's names and placed them up around the table with Velcro. I decided on Velcro so that they could recognise and pull off their own names should they need help to spell it or what the letters look like, and then place them back when they were finished.
From the email I received from one parent, "F has asked me for paper and pencils so that he could write his name at home but when I got it for him, he said he needed the table and the banner to write," the children really enjoyed the new edition to the room and what they can do here!
It's been so hectic lately but with the semester over, my exam done and block placement coming up, there will only be new posts from here on in! So let's get on with it...
As noted in some other posts, my AT plans her room and set up based on the letter of the week. We create a letter chart, with common words and the words we know at the beginning of the week and group discussions and planned activities often revolve around said letter. At the end of the week, the poster goes up on wall.
I have discussed this with some other pre-service teachers and it seems to be a common focus at this level of early childhood however each centre does it differently. For some, they only make the letter poster and talk about the words they know but my AT really goes above and beyond. Let's take a look at the letter L week...
The Letter L Poster
At the beginning of the week, the children create this letter poster. The picture are pulled out of a hat and they all take turns to guess what they are as they all start with L. At the end, the children can list all the words they know with the featured letter. The last step is counting and underlining all the Ls in the words that we write onto the poster.
The Lovely Letter L
At the start of the week, my AT played this song. On the first watch, the children simply watched what was happening.When they asked to play it again, they got up and dance, clapped and stomped their feet. For the rest of the week, they asked to dance to the robot song!
Ladybug Land
Early in the week, the children each collected a stone from outside and painted it with similar patterns to a ladybug. When dried, my AT took these painted rocks and added them to the tray above. This then sat at the project table, where the children are free to engage with it whenever they please.
Words with L
Every morning during group time, my AT does her morning minutes. This is her way of encouraging group discussion and the social behaviours expected during these discussion. It is also a way that she intends to prepare the children for what is expected of them when they go to school next year. Above is a copy of the morning minutes sheet, where they were asked, 'What words do you know that start with the letter L?' Their responses are recorded and the transcript is displayed near the sign in sheets for parents to view at the end of the day. This procedure provides some consistency for the children in the morning and ideas for planning, specifically based in the children's current interests.
Lemon Scented Play Dough
Dough Recipe
2 tablespoons cooking oil
4 tablespoons cream of tartar
2 cups of flour
1 cup salt
2 cups boiling water
bottled lemon juice
lemon extract
yellow food dye
Simply mix all the ingredients together until combined and knead until you get a consistent texture. Add extra essence or juice as necessary.
A member of staff and myself made the play dough with the children, giving them the ingredients to take turns to pour into the bowl. Since we used hot water, the other staff member mixed the dough. when ready, the dough was placed on the table with some wooden pegs and beads. The photos above show what play followed.
Conclusion - Rather than just focus on the letter in isolation, my AT really looks to provide a wholesome literacy experience which is not didactic or overstated. The linking to the letter L is so well distributed throughout the week and all the activities are so subtlety linked. I love the fact that the learning takes place without the children being denied their unstructured play time, something that will become more restricted as they move into primary school.
This form of planning is definitely something I will be coming back if I decide to become a kindergarten educator.
I completed a lot of assignments last year but this one was one of my favourites, which is saying a lot! The task was to complete a set of concept maps for a list of grammatical items we were given.
We were given the list at the beginning of the semester and the due date was set sometime during Week 10, after our vacation week. Each week during our tutorials, a group of 2-3 people would present a short PowerPoint on the grammatical item of the week and we were expected to take notes, ask questions and prepare the appropriate mind-map in our own time.
For our presentation, My partner K and I chose 'Type of Nouns' and rather then a PowerPoint, prepared a Prezi to share with the class. These presentations were worth 10% of our final grade and the both of us walked away with a HD.
We had the choice of how to create our maps and I went with Lovely Charts. I had used the online program in high-school on a PC; I loved how clean and professional the final product looked without using default fonts like Times New Roman and Verdana. So when I revisited their site and saw that they had an app, I looked into it. Now usually I only go for free apps, but at $5.50 I knew how good this program was and happily clicked 'buy now'.
The app is painfully easy to use and the part is its save function; you can email the diagram to yourself in a variety of formats. The only limitation I found with the app was the color schemes available; while there a plenty of nice colours there, I would have liked to be able to customise and mix the schemes. Besides that, use your fingers to draw shapes, use two finger to connect shapes and one finger to drag. There it is, painfully simple!
The original idea I had was to do two mind maps a week when I had the time but as things worked out, I majority of the work until the vacation week. Luckily I finished and had about 17 mind maps at the end of my ordeal which looked something like the one below...
But creating countless mind maps was not enough for my tutor, we had to make a grammar BOOKLET. So off to Officeworks I ran to get this piece of hard work bound. I choose the Pro-Click binding for this assignment as we were permitted to bring this into our exam and had I made a mistake, I would like to have had the option to change my mind map. One of my favourite components of this assignment was the fact that we had to include an acknowledgment thanking our classmates for their input since we used information from others presentations. I was really happy with my final product and thankfully, so was my tutor which reflected in my mark, another HD!
This post focuses on one of my assignments, which I am very proud of, for a Children's Literature unit I undertook last semester.
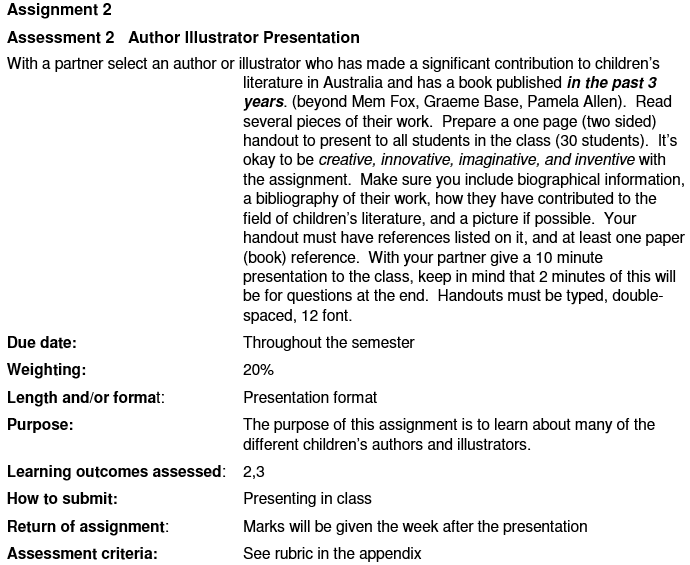
For this assignment, I had to create a presentation on an Australian children's author. My partner and I chose to focus on Mr. Paul Jennings. The assignment description doesn't give away much but we approached the task enthusiastically.
With an assignment like this, we saw a lot of Powerpoint presentations. Not that these weren't great, but these sort of presentations got repetitive and seemed to follow the same format. Times this feeling by about 15, one for each group, and this lead to a lot of people in the tutorial fidgeting and quickly losing interest.
We also saw a Prezi. This type of presentation was definitely a breathe of fresh of air and the girls responsible did a lovely job presenting. But my partner and I still wanted to try something a little different and out of the ordinary.
Above is a hyper-link to the website we created. We decided to compile an interactive website containing of all the information we needed to display plus some interesting extras, such as an animation, books reviews and some videos.
Taking this approach allowed us to be more flexible in the order we presented plus the different types of media meant that it wasn't always us talking which hopefully kept the class awake and interested!
We decided to stick to the more traditional format for our handout and in the end, it looked very much like the one you can see here.
I was extremely happy with the final product, how it looked and how the class responded to it, and by the look of our final mark, as was our tutor!
What do you think of our assignment?
Have a question about wix.com and its features?
Thinking of using this idea for your next presentation?
Leave a comment below and feel free to share this post and follow the LMST blog!