Showing posts with label eresource. Show all posts

Sunday, 20 July 2014

Placement - Creating Environments Part 3

The Handwriting Table 

The children in the kinder room love to write. Some have mastered their names already and write it on every piece of paper they can get their hands on while some of them are still experimenting with what letters they can trace, draw and recognise.

In knowing this, my AT and I have been doing everything we can think of to support this current interest of theirs. When choosing the order to wash hands, put on jackets, get place mats etc. we draw a letter or a name on the board. Some children knew their names and others while others had more fun sorting out the false names from the real ones. During my full control week, I asked the children what their favourite letters were and why for their morning minutes questions and I received some very thoughtful and insightful answers.

When it came time to change one of the activity tables, I had the perfect idea; a writing table!
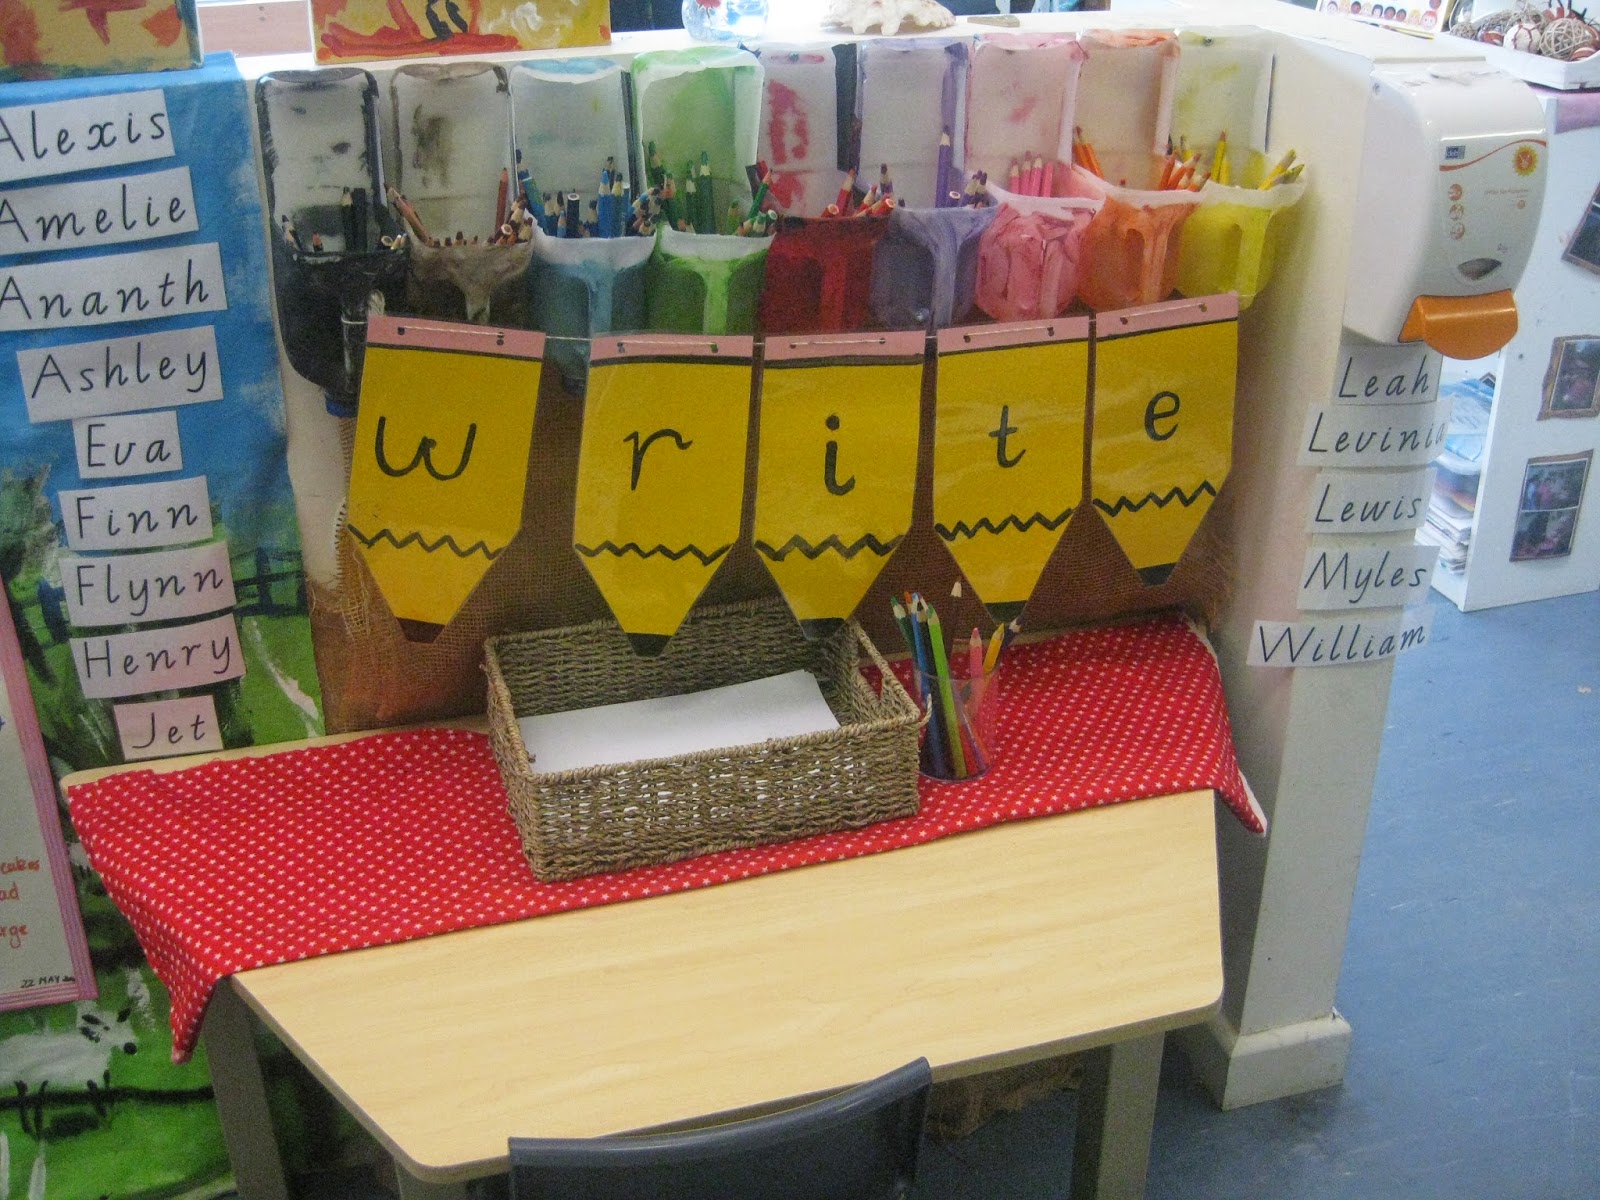

I got the idea for the banner from here but cut out yellow and pink paper instead and painted on the letters. After laminating, I used a hole punch to punch holes (duh) and strung it up using twine. I had to redo some pencils so that they could match so for your convenience and found at the bottom of the post, I have made a template that you can print out and either write, type or paint the letters onto.  The milk carton pencil holders were my AT's idea and sorts out the pencils by colour. After placing the banner up, setting out a tablecloth and some paper in a natural tray, I set to work on the most important part, the names!

The Victorian Modern Cursive Script font is the best tool you could have installed on your computer. It is the font used in Victoria to teach handwriting and to create handouts, posters, practice sheets...you name it, you can type it with this font! I used the holy grail of fonts to type out the children's names and placed them up around the table with Velcro. I decided on Velcro so that they could recognise and pull off their own names should they need help to spell it or what the letters look like,  and then place them back when they were finished.

From the email I received from one parent, "F has asked me for paper and pencils so that he could write his name at home but when I got it for him, he said he needed the table and the banner to write," the children really enjoyed the new edition to the room and what they can do here!

Sunday, 8 June 2014

My Learning Stories

Hi there,

As placement progresses, I have been diligently recording observations on my three focus children. On my last placement, I never wrote one learning story but I completed an infinite amount of anecdotal records. As an educator, these gave me a lot of information about a child and their developmental and learning needs. However, they were never included in C's portfolio and the few that my last AT included were hardly commented on by parents.

And it was this placement when I realised it, parents hate records, almost as much as I do! They are boring to read, they have no pictures and can come off as clinical and non personal. Considering this, I asked my current AT what she recommends, and the answer was learning stories. I began to look at the ones she had included in the children's portfolios and honed my skills. This is a sample product of what this placement has produced...   

Scroll down to download the PDF version
For the Parents
The Title
This is the hook; it needs to be catchy and it needs to draw attention. Obviously, it needs to link to the overall theme of the observation which is why I like to use alliteration in mine, as you can see from the sample.

The Images
This is what differentiates a learning story form an observation. Choose photos where the child's face is visible and where their actions are clear. Try to take pictures of them in action or from their perspective, limit pictures that look staged. The more photos you can include, the better!

The Story
This is where you get to have the most fun! Recount what you observed, but in a less objective format then you would when recording a record. Let the reader know what the child did, what they told you, how they looked. Finish with how the child left the experience or what they planned to do next. The comment needs to add some finality to the story you have created. 

For the Educator 
Evaluation 
I suppose this is when you would take a more objective tone in your writing. Break down what you observed; what skills are emerging, what attitudes are present, what questions are they asking? This is not so much a description of what happened throughout the experience, but more about how the child in question engaged. This is especially important to note in learning stories which contain more than one child; the learning story would be the same but the evaluation boxes would be different.

What Happens Next
How can you take this experience further, the question you should be asking yourself when thinking about what goes in this box. What can extend the learning that you observed? In the sample, L most enjoyed putting the seeds into the dirt, which was the inspiration for the gardening sensory box. Writing these thoughts and links down will help you to look back and see what you can include in your future planning.

Link to Framework
There is nothing more important to an educator than this section here! This is where you directly link what you have observed to the learning framework in your sector. For myself and all other Victorians, it is the Victorian Early Years Learning and Development Framework. Rather than type out the entire outcome, I like to give each main point a number and the sub-points, a decimal. For example, if  the child has demonstrated effective communication, by interacting non-verbally with their peers, I would have written it as 5.1, and following the dash, documented exactly how they did so.

Overall Formatting
Just some things to note about the organisation and formatting about my learning stories:
  • choose simple and familiar fonts which are easily read
  • page borders add a nice touch to the document but it's not necessary - try clip art if you can't find an appropriate border
  • adding a border to the text boxes means that the text is contained 
  • use colours that relate to the theme but are not to hard to read.
  • size your photos appropriately, you shouldn't have to squint in order to see what happening
Please note that these are my ideas on what works really well. I have received a lot of praise for this format and it has worked incredibly well so far but I understand it's not the only direction to take. Please, free free to share how you do yours - I would love to see what's being stored in portfolios in other early learning centres around the globe.


Miss Tracy xx

Sunday, 23 March 2014

My Educational App Collection

Good morning all,

I have been posting a few app reviews lately and thought it was about time I showed you my app collection. It's taking a while to come up with this many educational apps and I have had some great sources; the Ipadopedia, a children's literature unit I took in first semester and a music education unit I just completed.
But lately I have found a new source, the Education section of the iTunes store. This section of the store caters for varying levels of education, from early childhood straight up to self education for adults. It is meticulously organised, much like my iPad, and has great sections:
  • Reading
  • Maths
  • Physics 
  • Chemistry
  • Music
  • Writing
  • Life Science
  • Geography
  • Astronomy and Earth Science

And so we begin the journey through my iPad! I have provided a picture of each folder and the apps they contain and what section I find them useful to store under.
LMST BLOG


COACHING


DEMONSTRATIONS


DIAGRAMS

DOCUMENTING


LITERACY


MANAGEMENT


MATHS


MEASUREMENT


MUSIC


SCIENCE & GEOGRAPHY


SOUND MANAGEMENT 

And as usual, all apps I have posted today are available on the App Store however please note some are free and some are paid so please check before you press the little green button!

Miss Tracy xx


Sunday, 2 March 2014

Assignment File - Sketchbook and eResource Part 2

Hello there,

As promised, here you will find part 2; the eResource. This part of the assignment asked us to create a live webpage using Web 2.0 technology, focused on a single topic relating to the visual arts. This resource would not only be for assessment but for our fellow pre-service teachers as well as teachers out there already teaching with access to the internet.

I chose the theme 'A Bug's Life' after covering a number of artists who focused on natures and the creatures in it. Since I was already extremely familiar with Blogger, I chose this as my method of presentation.

And so my discovery unit was born! Click the title to take a peek...


This unit looks at the topic of bugs and insects as a stepping stone for visual art exploration and how to weave this knowledge into other aspects of curriculum and the learning environment.

One aspect of this assignment that I had a hard time working out was the lesson plans I was expected to create.  While I have done 3 curriculum based units, we have not touched on writing lesson plans yet, primarily since we are still studying early childhood. So I took to the internet and put together a template myself, which you can view  as PDFs in the appropriate sections. 

I also had many internal (and one external) debates on how these activities I had designed should be assessed or documented. In the end, I devised a simple rubric with smiley faces, which can be completed by the teacher, student or together as a reflection exercise.

I was very happy with the outcome of both pieces of work and with my hard work and perseverance, I earned myself a credit (C)!

Miss Tracy xx