Hello!
With full control in full swing, it was expected during my placement that I plan for one week and implement for two days. I had seen my AT's weekly plan up every week I was at placement so I knew the expected format and sat down with her to discuss what the expectations for the week were.
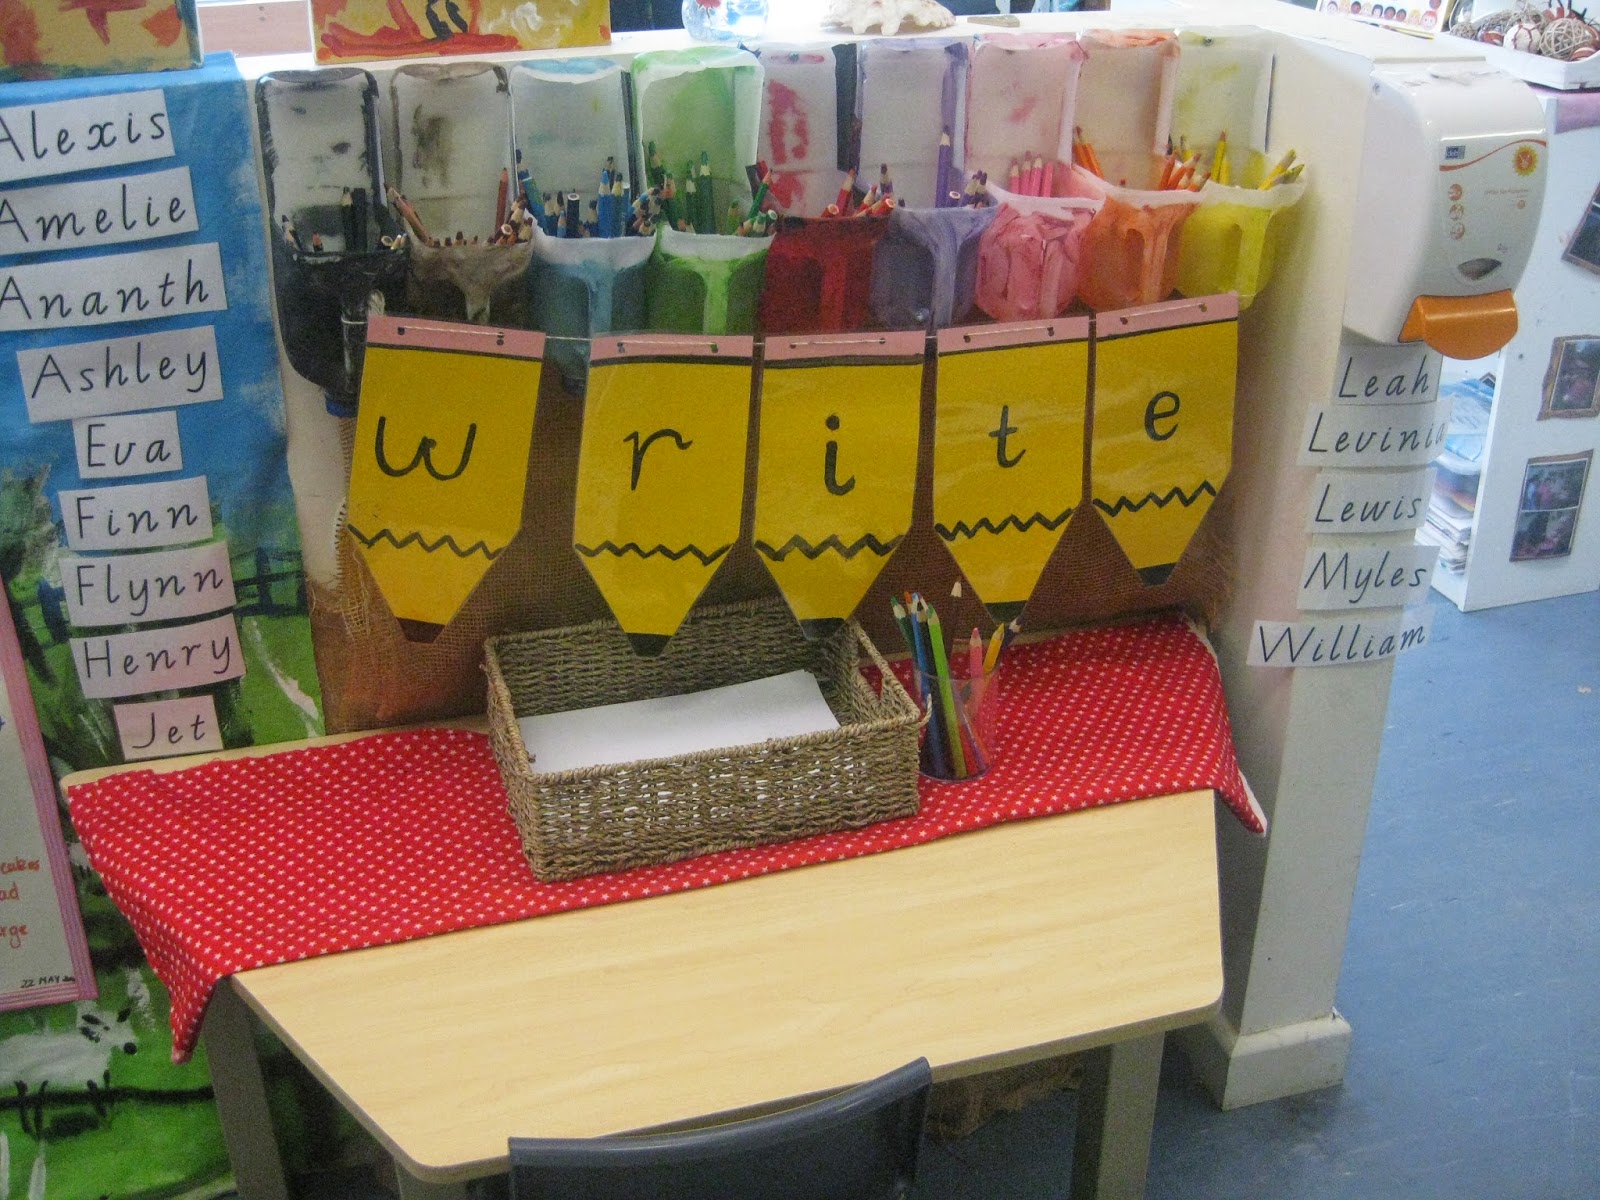
As you may have noticed, many of the environments and experiences I have been writing about on here have focused on the letter P, this being because during my full control week, the focus letter was P. The following was my plan for the week...
I accounted for weekly activities, such as sport and yoga, some activities that my AT had in mind and some general planning included every week. The focus on Literacy and Numeracy was part of my AT's original format. It's not how I would probably set out my plan but it was interested to use these as a focus.
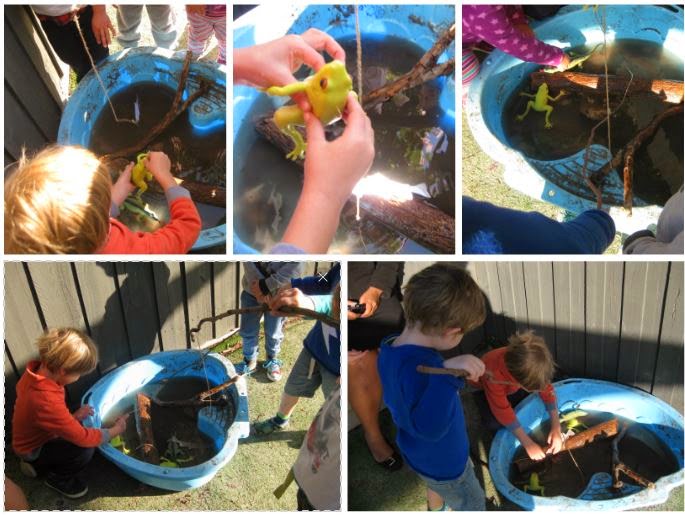
The hardest part of constructing this was having all these great ideas for the children and the room but having to find somewhere to link it and aligning these with the children's interests. The research that went into coming up with this plan was so fun and one of my favourite parts of the job. Using other blogs, Pinterest, Tumblr I found heaps of ideas incorporating the letter P and the children's current interests and favourite experiences and then planned these around the routine and timetable of the room.
As the week progressed, I wrote little notes onto the plan, which is displayed above the children's cubbies for parents to view. I wrote the date they were implemented, whether or not it was sucessful and whether I would be doing an observation or learning story for the experience. These annotations helped the parents see what was happening throughout the week and my AT see how I was progressing and following up on my planning and programming.
As a result of this planning, my full control was successful and I learned heaps of new things and really began to see myself as an early childhood educator rather than just a visitor or student.
Keep your eyes peeled for more about my time in full control!
Miss Tracy xx
Showing posts with label did it myself. Show all posts
Sunday, 28 September 2014
Sunday, 21 September 2014
Placement - Planned Experiences Part 8
Hi there!
Still trying to capitilise on all the rich experiences I had on placement, today's post is about how to make and use puffy paint! Again with the letter P theme, my AT's idea was to create the paint and set them up on our art and craft table.
The recipe for creating the paint is super simple, with things you can readily find in your kitchen or supermarket.
Puffy Paint
1 cup flour
1 cup salt
3 cups water
Paint
Mix all the ingredients together until they form a batter-like consistency. Depending on how many colours of paint you would like to make, separate into your chosen containers that the children will use to paint with (see note). Add a small squirt of paint to each mixture and mix until you see the desired colour appear and then you're ready to go!
I used zip lock bags with a smal hole cut out from a corner for the children to paint with. While there was no problems using these, they were very flimsy and some children had difficulty using the bags to 'pipe' the paint. I would suggest using old sauce bottle or buying a new set as they are easier to hold and could have plenty of other uses in the classroom, not just for this activity.
The other thing I noticed when I tested it at home was that normal paper would get soggy under the batter and would rip, tear or start to break down. For this reason, at the kinder, we used A3 canvas paper that had been halved for the children to paint with. Stiff cardboard or poster paper can substitute if you don't have or can't find this.
Once I had set up the activity after afternoon tea, the children were very eager to see what was happening. My AT and I had to show a few children how to hold and press the bag, but they were very eager to get painting...
Now the magic happens! After the children had completed their painting, we set them on the drying rack. During their outside play time, I went into the staff room and put the painting in the microwave for 30-60 seconds depending on how much paint was on the paper. The flour and salt cook leaving the paint raised and very bumpy.
The children loved the change and how different it felt. Some even compared the picture to the paints by feeling one and then the other. This was a really fun and engaging activity and could be used with younger or older children. Give it a try in your classroom and let me know how it goes!
Miss Tracy xx
Sunday, 7 September 2014
Placement - Creating Environments Part 5
Hello!
Keeping with the children's interest in the home corner, imaginary play and the letter of the week theme, I began to look for some environment ideas during my full control week. After perusing Pinterest, I came up with the idea of creating a felt board pizza!
After a trip to my local Spotlight, a large chain craft store, where I purchased an A4 multi-coloured felt set, an A3 piece of stiff brown felt, I returned home and looked at what exactly goes into a pizza.
I found this pin, which also has some great ideas for other felt board designs, and decided to include the following toppings:
- cheese
- ham
- pepperoni
- mushroom
- capsicum
- chicken
- olives
It was painstakingly difficult to cut out some of the shapes on the felt and because I traced the shapes on the felt with permanent marker you can see the outline where my cutting was a little off but the end result was pretty good...
I thought the pizza box would add a nice touch so imagine the face of our local pizza hut guy when I asked if I could have a clean empty box alongside my thin and crispy super supreme! I added picture and word labels to the toppings box and besides the large mirror sign and sectioned container of toppings, I also added a small notepad and pen so the children could 'take orders'. During their play, one child suggested we add in a phone so people could call and tell us while another suggested we get a car so we could deliver!
From the pictures and observations, it looks like they had a lot of fun...
This set up encouraged the children to talk about what they wanted to have on their pizza, to consider others as they completed order and encouraged them to use letters and words to symbolise any orders on the note pad. They became very adept at sectioning and sorting the ingredients during pack up time and were quick to tell each other how to take care of their new toy.
It was so cheap and easy to make, minor my small embarrassment at Pizza Hut, and the quality of play that occurred as a result was amazing!
Felt and felt boards is definitely something I want to further play around with and experiment with in the future so stay tuned for any new developments!
Miss Tracy xx
Posted by
Miss Tracy
at
9:00 am
No comments:
Labels
3-5,
arts and craft,
bargain,
block placement,
creating environments,
did it myself,
full control,
home corner,
imaginary play,
make and create,
pinterest,
placement,
second year


Sunday, 31 August 2014
Group Observations and Learning Stories
Hola!
I have shared how I write my individual observations for portfolios and planning on here before but am yet to share group learning stories. I only started writing them this year but they are an incredible tool!
Most kindergarten classrooms ave a space where we educators post what we are doing in the classrooms and pieces of children's work to share with parents and caregiver. this was no different in my placement centre...
Featured on this board are two group learning stories printed on A3 paper and photos taken from the group experiences. Writing a group learning story, I feel, is quite different from writing them for an individual child.
Rather than focusing on the specific, I tend to focus on what all the children are doing, what they are learning, what they all have in common. I also try to include some individual responses, sometime included in the story or by writing/typing them out and sticking them up near posted story. This one was an example from the creek experience I set up earlier in the year...
As always, include lots and lots of photos! I cut mine off the bottom, but taking and selecting group phots is one of the most fun parts of writing these! These group experiences are wonderful to have but even better to document and share with families. Slightly adjusting how we write these isn't too difficult but the end result is completely worth the extra time and effort.
Some key things to remember:
Would love to hear from other educators who do these... or are planning to!
Miss Tracy xx
I have shared how I write my individual observations for portfolios and planning on here before but am yet to share group learning stories. I only started writing them this year but they are an incredible tool!
Most kindergarten classrooms ave a space where we educators post what we are doing in the classrooms and pieces of children's work to share with parents and caregiver. this was no different in my placement centre...
Featured on this board are two group learning stories printed on A3 paper and photos taken from the group experiences. Writing a group learning story, I feel, is quite different from writing them for an individual child.
Rather than focusing on the specific, I tend to focus on what all the children are doing, what they are learning, what they all have in common. I also try to include some individual responses, sometime included in the story or by writing/typing them out and sticking them up near posted story. This one was an example from the creek experience I set up earlier in the year...
As always, include lots and lots of photos! I cut mine off the bottom, but taking and selecting group phots is one of the most fun parts of writing these! These group experiences are wonderful to have but even better to document and share with families. Slightly adjusting how we write these isn't too difficult but the end result is completely worth the extra time and effort.
Some key things to remember:
- keep it general, try not to write about specific children or their responses
- chose to an experience where about 80% of your students were involved in, not just one or two
- linking to the curriculum framework is important so think of the learning that happens, what thinking did this inspire, what relationships are being built?
- link the chosen experience to how you will plan in the future - this is one of the most important aspects!
- display these printed stories in a well trafficked area and make the presentation appealing to look at - the point of these are to share what happening on the inside with the outside.
Would love to hear from other educators who do these... or are planning to!
Miss Tracy xx
Sunday, 27 July 2014
Placement - Creating Environments Part 4
The Doctors Office
The home corner at placement is a little dated. While the furniture is neutral in color and in good condition, the play items in there are no longer extending the children's interests and so I set about looking at how we can change it. I took this photo as part of one of my observations...
The children who usually prefer to play in the home corner moved all the chairs and lined them up against the mirror to make a bed. One girl, E, tucked L into the new bed, using the tablecloth as a blanket and put her hand against her head to check her temperature. She then brought a cup up to L's lips and let her sip. This type of play could have been inspired by the doctor's office some other educators have set up in the 2-3 year old room, where these children spend family grouping in the morning.
Upon watching this, I asked the children if they could change the home corner, what would they put there instead? It was no surprise when they suggested a doctor's office or hospital. If you follow this Pinterest board of mine, you might have noticed a slew of pins awhile back around medical play as I looked online for inspiration. This was the final result...
Using what I could find in the storeroom, what my AT had from their last hospital play area and moving around some furniture, the area began to take shape. A small table with an old desktop computer, a screensaver printed and tacked on, made the reception area while two chairs made up our waiting room. Including the height chart, eye test, light-box and scales made the area seem more authentic. The bookcase which previously housed utensils and cookware, is now labelled (using this font) and displaying the medical equipment of the Whales Kinder Hospital.
The instruments included some from a store bought doctors kits, and three identical jars filled with cotton balls, cotton buds and Popsicle sticks.
The band aids were made with paper cutouts but you can download print the template below onto cardboard or poster paper for the same result.
The bandages are large pieces of beige/cream ribbon cut to size. I would suggest measuring the ribbon around one of the children to see how much is adequate to tie a knot as our ones were only able to be tied around toys.
The patient forms can be downloaded from here, they are a great literacy tool and the pictures make this template perfect for early childhood. Print out about 20 and attach them a clipboard, don't forget to have a cup of pens or pencils handy like we did near our reception desk.
The stethoscope we used was a real medical one and worked, however if you cant find one or are hesitant to use one in the room, there are plenty available in play doctor kits.
The doctor's bag was made using an old cosmetic case and simply painted it black with a large red cross on top.
The blood pressure cuff was made using a recycled plastic screw-top container. On the top, I attached some cord and a cardboard arm cuff with a red cross glued on and from the left/right side, a cord attached ti a partially blown balloon. This was one of the most played with item as the children had seen it at the doctor's but never had the opportunity to see it in use.
The x-rays that we used in this environment came from a set of animal x-rays purchased through Educational Experience and were stored on a clipboard in this cubby when not on display on the light-box.
This new area of the room was well received by the children, who continued to surprise me with how they chose to play...
Miss Tracy xx
Posted by
Miss Tracy
at
9:00 am
No comments:
Labels
3-5,
block placement,
creating environments,
did it myself,
download,
freebie,
home corner,
make and create,
observations,
placement,
play based learning,
role play,
second year,
series


Sunday, 20 July 2014
Placement - Creating Environments Part 3
The Handwriting Table
The children in the kinder room love to write. Some have mastered their names already and write it on every piece of paper they can get their hands on while some of them are still experimenting with what letters they can trace, draw and recognise.In knowing this, my AT and I have been doing everything we can think of to support this current interest of theirs. When choosing the order to wash hands, put on jackets, get place mats etc. we draw a letter or a name on the board. Some children knew their names and others while others had more fun sorting out the false names from the real ones. During my full control week, I asked the children what their favourite letters were and why for their morning minutes questions and I received some very thoughtful and insightful answers.
When it came time to change one of the activity tables, I had the perfect idea; a writing table!
I got the idea for the banner from here but cut out yellow and pink paper instead and painted on the letters. After laminating, I used a hole punch to punch holes (duh) and strung it up using twine. I had to redo some pencils so that they could match so for your convenience and found at the bottom of the post, I have made a template that you can print out and either write, type or paint the letters onto. The milk carton pencil holders were my AT's idea and sorts out the pencils by colour. After placing the banner up, setting out a tablecloth and some paper in a natural tray, I set to work on the most important part, the names!
The Victorian Modern Cursive Script font is the best tool you could have installed on your computer. It is the font used in Victoria to teach handwriting and to create handouts, posters, practice sheets...you name it, you can type it with this font! I used the holy grail of fonts to type out the children's names and placed them up around the table with Velcro. I decided on Velcro so that they could recognise and pull off their own names should they need help to spell it or what the letters look like, and then place them back when they were finished.
From the email I received from one parent, "F has asked me for paper and pencils so that he could write his name at home but when I got it for him, he said he needed the table and the banner to write," the children really enjoyed the new edition to the room and what they can do here!
Posted by
Miss Tracy
at
9:00 am
No comments:
Labels
3-5,
block placement,
creating environments,
did it myself,
download,
eresource,
freebie,
full control,
literacy,
placement,
second year,
series,
stationery


Sunday, 13 July 2014
Placement - Planned Experiences Part 6
Making Bread
Following some of our group time discussions and the success of the whole grain play dough, I decided to bake some bread with the children. I chose to do it on the Friday, when the children celebrated their 100 days at kinder and make fairy bread out of the final product for them to enjoy at the party.
I bought a Laucke bread mix from my local Woolworths which was only around $1.50 and contained the flour, yeast and instructions on whether you wanted to make it from hand or with the bread maker. I decided to forgo the bread maker so the children could see how the dough changed.
We sat in a large circle during our morning group time and talked about what we could cook in the oven during the Morning Minutes. We then took turns putting the flour into the mixing bowl. Since the pack asked to use hot water, I drew on the measuring cup with a whiteboard marker and the children told me when to stop pouring the water from the kettle.
After I initially kneaded it, the children each had a feel of the dough and looked for a place in the room to put it so we could watch as the yeast worked its magic. We kept checking back every hour to see how much the dough had grown and it did not disappoint! They loved poking the dough and hearing the air hiss out and comparing it to what it looked like the last hour.
We put it into the oven, it hardly looked any time to cook, and we took in the lovely smell wafting down the hall. During this time, mt AT also baked the rainbow cake she had made with the children.
After cutting up the loaf, buttering and sprinkling the bread, we all sat down together to enjoy the yummy fairy bread we had made together...
This experience incorporated many science concepts and encouraged the children to hypothesis and be curious about what they were seeing. Being able to see the dough change, bake and then eat the final product fostered such a sense of accomplishment within the group. The timing was perfect, since they celebrated 100 days at kinder and the finished product tasted good! Will definitely be one to try out again, perhaps paired with the story of the Little Red Hen.
Miss Tracy xx
Miss Tracy xx
Posted by
Miss Tracy
at
9:00 am
No comments:
Labels
3-5,
did it myself,
implementation,
placement,
planned experience,
planned experience series,
play based learning,
recipe,
role play,
second year,
sensory play,
series


Sunday, 6 July 2014
Placement - Planned Experiences Part 5
Making Bread
The first week of my block placement and was nothing like I expected! The requirements were very different compared to the last. In the first week, I had to prepare 4 observations per focus child (I have four), four planned experiences or environments and a group experience. I also had the parent communication strategy to tackle but you can read all about it in last weeks post, Parent Postcards.
I decided on the theme of baking for my planning for the week. The children in the room love cooking together and food play. Cooking provides an opportunity to explore rich science and mathematical concepts as well as genuine and authentic literacy opportunities. In knowing this, i used the following recipe to make a batch of wholegrain play dough, or bread dough:
Wholemeal Play Dough
2 tablespoons cooking oil
4 tablespoons cream of tartar
2 cups wholemeal flour
1 cup salt
2 cups water
Mix allthe ingredients together and stir over a medium heat for 3 - 5 minutes or until the mixture congeals. Remove from the heat and turn onto a floured bench and knead until soft. store in an airthight container for up to 6 months.
I set up an invitation to play during our afternoon quiet time session. I placed the ready made dough, patty pans, cutters, rolling pins and brushes out (dip platters make excellent play trays for play dough, you can pick up cheap ones from $2 shops).
This was the result...
The children made pancakes, pizzas, cupcakes, bread rolls, sandwiches...the list goes on!
The dough turned out to be so soft and malleable. The wholegrain flour gave it such a unique look, it was like actually looking at freshly made dough. The dough withstood the play time and I brought it out over the next few days as well due to its popularity with the group.
I thought I may have a few problems with the sesame seeds, with things like allergies, food restrictions and NQf standards. However, after the children added it to their dough, it mixed in really well and added some texture to the already amazing dough. After play, I stored the dough in an airtight container and it should keep for about 6 months.
I was really happy with this experience and how it went with the children, come back to see how the rest of the week's planning went!
Miss Tracy xx
Posted by
Miss Tracy
at
9:00 am
No comments:
Labels
3-5,
did it myself,
imaginary play,
implementation,
placement,
planned experience,
planned experience series,
play based learning,
recipe,
role play,
second year,
sensory play,
series


Sunday, 22 June 2014
Parent Postcards
Hi all,
I am currently in the midst of my block placement and slowly getting accustomed to the new expectations. one of those is documented in my placement booklet as follows:
Each day, I document 5-6 things that their child did or engaged with and hand-write it onto the left side. On the address lines I write the children's name, the room they are currently in and the date of the observation. My current placement's logo, which I have placed under the address lines, features puzzle pieces on which I place pictures of their child and how they spent their day at kinder.
The children in the kinder room absolutely love writing their names at the moment so I have been asking them if they would like to write their names instead of me doing it. For the uninterested children, I usually just write their name myself.
Just like the learning stories, I try to choose easily identifiable photos of the children and their friends. I also try to include pictures from group time, outside and scheduled sessions, like Hey Dee Ho.
These postcards have proved to be a success! They give the parents a quick slice of what happened that day and something to stick on the fridge. Since they are dated and often approved and requested by the children, they are also something which can be included in their portfolios.
The only problems I have had so far is the timeline. I try to complete one per night with a different child each time but taking and downloading the photos, putting it together, printing, writing and photocopying, it can be really difficult to produce the amount that I would like to send home. I have also been having some issues with whether or not it reaches parents; they seem to be staying in some children's bags and not being read until a few days later.
These aren't massive problems but it means I may have to tweak my approach further down the track. I'm going to stick with this communication method until the end of placement (next week).
Would really appreciate some ideas on what you think all think and whether this is something you would consider implementing!
I am currently in the midst of my block placement and slowly getting accustomed to the new expectations. one of those is documented in my placement booklet as follows:
"Implement a parent communication strategy during block placement."
It says so much and yet ...it doesn't. Many of my units, my assignments and my readings have discussed different ways of involving parents and the many benefits of a early childhood service who does.
Taking what I knew, that parents usually love photos and something specific to their child, I came up with the following template...
Each day, I document 5-6 things that their child did or engaged with and hand-write it onto the left side. On the address lines I write the children's name, the room they are currently in and the date of the observation. My current placement's logo, which I have placed under the address lines, features puzzle pieces on which I place pictures of their child and how they spent their day at kinder.
The children in the kinder room absolutely love writing their names at the moment so I have been asking them if they would like to write their names instead of me doing it. For the uninterested children, I usually just write their name myself.
Just like the learning stories, I try to choose easily identifiable photos of the children and their friends. I also try to include pictures from group time, outside and scheduled sessions, like Hey Dee Ho.
These postcards have proved to be a success! They give the parents a quick slice of what happened that day and something to stick on the fridge. Since they are dated and often approved and requested by the children, they are also something which can be included in their portfolios.
The only problems I have had so far is the timeline. I try to complete one per night with a different child each time but taking and downloading the photos, putting it together, printing, writing and photocopying, it can be really difficult to produce the amount that I would like to send home. I have also been having some issues with whether or not it reaches parents; they seem to be staying in some children's bags and not being read until a few days later.
These aren't massive problems but it means I may have to tweak my approach further down the track. I'm going to stick with this communication method until the end of placement (next week).
Would really appreciate some ideas on what you think all think and whether this is something you would consider implementing!
Miss Tracy xx
Sunday, 8 June 2014
My Learning Stories
Hi there,
As placement progresses, I have been diligently recording observations on my three focus children. On my last placement, I never wrote one learning story but I completed an infinite amount of anecdotal records. As an educator, these gave me a lot of information about a child and their developmental and learning needs. However, they were never included in C's portfolio and the few that my last AT included were hardly commented on by parents.
And it was this placement when I realised it, parents hate records, almost as much as I do! They are boring to read, they have no pictures and can come off as clinical and non personal. Considering this, I asked my current AT what she recommends, and the answer was learning stories. I began to look at the ones she had included in the children's portfolios and honed my skills. This is a sample product of what this placement has produced...
Scroll down to download the PDF version |
For the Parents
The Title
This is the hook; it needs to be catchy and it needs to draw attention. Obviously, it needs to link to the overall theme of the observation which is why I like to use alliteration in mine, as you can see from the sample.
The Images
This is what differentiates a learning story form an observation. Choose photos where the child's face is visible and where their actions are clear. Try to take pictures of them in action or from their perspective, limit pictures that look staged. The more photos you can include, the better!
The Story
This is where you get to have the most fun! Recount what you observed, but in a less objective format then you would when recording a record. Let the reader know what the child did, what they told you, how they looked. Finish with how the child left the experience or what they planned to do next. The comment needs to add some finality to the story you have created.
For the Educator
Evaluation
I suppose this is when you would take a more objective tone in your writing. Break down what you observed; what skills are emerging, what attitudes are present, what questions are they asking? This is not so much a description of what happened throughout the experience, but more about how the child in question engaged. This is especially important to note in learning stories which contain more than one child; the learning story would be the same but the evaluation boxes would be different.
What Happens Next
How can you take this experience further, the question you should be asking yourself when thinking about what goes in this box. What can extend the learning that you observed? In the sample, L most enjoyed putting the seeds into the dirt, which was the inspiration for the gardening sensory box. Writing these thoughts and links down will help you to look back and see what you can include in your future planning.
Link to Framework
There is nothing more important to an educator than this section here! This is where you directly link what you have observed to the learning framework in your sector. For myself and all other Victorians, it is the Victorian Early Years Learning and Development Framework. Rather than type out the entire outcome, I like to give each main point a number and the sub-points, a decimal. For example, if the child has demonstrated effective communication, by interacting non-verbally with their peers, I would have written it as 5.1, and following the dash, documented exactly how they did so.
Overall Formatting
Just some things to note about the organisation and formatting about my learning stories:
- choose simple and familiar fonts which are easily read
- page borders add a nice touch to the document but it's not necessary - try clip art if you can't find an appropriate border
- adding a border to the text boxes means that the text is contained
- use colours that relate to the theme but are not to hard to read.
- size your photos appropriately, you shouldn't have to squint in order to see what happening
Please note that these are my ideas on what works really well. I have received a lot of praise for this format and it has worked incredibly well so far but I understand it's not the only direction to take. Please, free free to share how you do yours - I would love to see what's being stored in portfolios in other early learning centres around the globe.
Miss Tracy xx
Sunday, 1 June 2014
Placement - Planned Experiences Part 4
Wishy Washing
Remember how the ice cream play dough parlour went? Remember the sweet, sweet children who helped me to wash up the dishes? Remember how I told you how much these kids love water play? Link them all together and what experience do you have? A washing up station!
I put together a wooden dish rack, a crate of soapy water, some dishes from our home corner and four brightly coloured cloths and this was the product. Again, I set this up in the morning, outside, before the children could spend anytime outside. I find this presentation of play gives the children more freedom and flexible in what they could can do as opposed to when they watch me interact with the materials and what do with them.
At first, the children were content washing up the cutlery I brought out from the home corner. When these were deemed clean, the children began to bring toys from their sandbox and mud kitchen to clean. When these no longer fit on the drying rack, L brought out a large crate to place the clean and dried items.
The fact that these children so promptly and effectively solved the problems they encountered within the play reminds me of why I love this field and why i continue to do what I do. What surprised me even more was the engagement of the boys in the room.
Many of them came by and had a look at the activity and it wasn't until they saw L and the other girls splashing the water that they took interest in something they usually walk by when playing indoors.
This activity was super simple and yet the children had so much fun. By the end of the day, all of our sand and mud toys were squeaky clean. Ah...the planning cycle in action!
Miss Tracy xx
Sunday, 25 May 2014
Placement - Creating Environments Part 2
What's the Scoop?
They are so simple to make, simply sticky tape a piece of coloured wool to the ping pong balls and wind the string around until you have can't see any of the ping pong ball colour. I used a total of 24 balls but feel free to make more or less depending on numbers in your room. I would suggest wrapping the wool super tight and tying it off really well as some of the children managed to unravel the wool or break the knot I had used when trying to pull the ball out of the cones.
Besides these, you can find everything else in-store. I picked up the ice cream scoops from Kmart for only $2 and the porcelain cones from Typo, $3 for 4. If you can make it to the Southern Cross Station DFO, Melbourne, there are currently sitting on the sale shelf!
I set the environment up before the children could arrive, so they arrived to this scene...
Plenty of play ensured...
This was one of the best environments I have had the pleasure of setting up. It was so easy and simple and yet the children found such joy and happiness when they were engaging with it. The staff were equally impressed, at the set up and the materials used to create this set up.
This is definitely one I will be saving to use again, in my own classroom!
Miss Tracy xx
Posted by
Miss Tracy
at
9:00 am
No comments:
Labels
3-5,
creating environments,
did it myself,
home corner,
imaginary play,
implementation,
indoors,
make and create,
placement,
play based learning,
role play,
second year,
series,
where to buy


Sunday, 18 May 2014
Placement - Creating Environments Part 1
Creek Explorers
If there is one thing I have noticed about the children in this kinder room, it is their love of exploring and how much they love playing with water. Last week, after days of rain, a large puddle formed over part of our playground. While did this pose a safety threat due to its size and depth, the educators cornered it off and allowed play provided that the children didn't put their hands or feet in the water.
One of my focus children, W, used a garden rake to play with this new attraction. He skimmed it across the water and watched the patterns it made. When I asked him what he was doing, he told me his was fishing, and that all the fish went into the bucket, the large bin we use to store the sand and water toys in.
I pondered over this observation throughout the week and used what I had seen as the basis for my next implementation; a creek environment where the children could explore a small ecosystem.
After filling the bottom of the container with various sized pebbles and filling in one-third full of water, i began to arrange the elements of this environment. I purchased the frogs from my local dollar shop, along with the lizard. I foraged the park across from my house, and the kinder store room, for the large logs and twigs. After attaching some twine and a hook shaped paperclip to the long twigs, I had two fishing rods.
Accompanying the creek were some small fish! I printed and laminated images of trout and attached them to paperclips, so that the children could link the hook and the paperclip to catch the fish. Below is a link to the document that you can laminate to create your own fishing experience! In the end, I added a total of 8 fish.
The children were so excited to watch me put this together! By the time I had finished, they had already picked up the frogs, experimenting with how stretchy they are and who was too scared to even attempt touching them. The fishing rods worked great, however I wished I had made more so that more children could fish simultaneously with out too much conflict. Had I the money, I would have acquired a container which looked more natural, but I made do with what the centre already had.
Some images of the little explorers...
UPDATE 28/05/2014 - The water, if not changed regularly, begins to smell and can be dangerous if accidentally ingested. If you plan on having this environment active for longer than 7 days, ensure you change the water as soon as you notice any changes.
Miss Tracy xx
Posted by
Miss Tracy
at
9:00 am
No comments:
Labels
3-5,
creating environments,
did it myself,
download,
explore,
freebie,
implementation,
outdoors,
placement,
play based learning,
second year,
sensory play,
series


Sunday, 11 May 2014
Placement - Planned Experiences Part 3
Play Dough Ice Cream Parlour
The girl:boy ration in my kinder room is little off on Wednesdays, with only 3 girls to about 8-9 boy, While I don't mind hearing about the coolest Teenage Mutant Ninjas Turtles and having cars flying around the room, it does mean that sometimes the home corner is left a little empty and lonely.
Taking this information and my observations of L, one of my focus children, I searched for a play experience which draw some more attention to this area of the room and yet still be of interest to all of the children. And what do all children love...ICE CREAM!
I was inspired by this pin from Play Create Explore. After consulting my AT about the ingredients, as some centres have strict no food planning policies, we both came to an understanding this activity would be great! I also received some important information about certain children in the room who had a love of eating play-dough and began to prepare accordingly...
Dough Recipe
2 parts cornflour
1 part hair conditioner (any brand will work, I used a cheap brand brought in bulk)
Mix together in large bowl until they form a sticky kind of dough. Remove it from the bowl and begin to knead an work it on a lightly dusted table until its smooth and dry to touch.
For the separate flavours, split your prepared dough into three (or make another two batches depending on how much you want) add the following ingredients:
Vanilla - 1 cap vanilla essence
Strawberry - 1 cap pink/rose food colouring (or a few drops of red), 1 cap of strawberry essence.
Chocolate - 2 tablespoons cocoa powder, 1 cap chocolate essence
For the play experience, I prepared the dough the night before, placed it in some loaf tins and added ice cream scoops. By using the scoop a few times over the prepared dough, it begins to look more like ice cream than when you roll in out smooth. I also added some toilet rolls for ice cream cones, red wishing stones for cherries and fine wood wool as sprinkles. I would have loved to have made some rainbow coloured rice for sprinkles instead but there's a no food policy!
When it came time pack up, since all the flavours had "melted" together, I collected the remaining dough. The test batch I made on 3/5/14 is still going strong.
I found wrapping the dough in plastic wrap and storing in an air tight container works best. When you're ready to use it again, knead it until smooth and if it seems a little dry or brittle, add conditioner 1 table spoon at a time until you reach the desired consistency.
I was so thankful to have some lovely volunteers help me to do the washing up as well!
The experience was well received by the children, as shown by some of their responses:
"Look at this rainbow ice cream!"
"Can I have another cone?"
"I made a super fat ice cream!"
"Look at my ginormous one!"
"This one smells like chocolate...I need sprinkles. Can we make it pink again?"
It's a rainbow ice cream; it has white, brown and pink!"
It's definitely one to keep and try with your kids, let me know how it all turns out!
Miss Tracy xx
Miss Tracy xx
Posted by
Miss Tracy
at
9:00 am
No comments:
Labels
3-5,
did it myself,
imaginary play,
implementation,
placement,
planned experience,
planned experience series,
play based learning,
recipe,
role play,
second year,
sensory play,
series


Sunday, 4 May 2014
Placement - Planned Experiences Part 2
Garden Sensory Box
Every week in our kinder room, we have a letter focus and last week's was the letter 'G'. We listed all the words we knew which started G and my AT set up a grass growing station where the children could see mustard and fennel seeds grow. We have also been changing the vegetable patch outside and planting some flowers in the barrels.
To support these changes, I thought a garden sensory bin would complement what the learning environment and the current interests of the room. After discussing this, I began working on putting the environment together.
I got the inspiration for this environment from this post and began collecting the materials:
- Two 6 egg cartons
- Green pipe cleaners
- Paints
- Envelopes
- Coloured paper
- Popsicle sticks
- Got glue gun and sticks
- Pebbles
- Laminator and sheets
First step was cutting up the carton, by the end of it you should have 12 little 'cups' and make sure you save the lid for a seedling box. I cut up 2 pipe cleaners to make 12 little pieces, folded in half to make the 'V'. You can paint the cups whatever colours you like, I chose these because they matched the colours of the vegetables I picked.
Once the paint has dried, cut a little slit into the tops of the cups so you can poke the pipe cleaners through. To make them look a little cuter, I curled the tops on a pencil. And there you have it, little vegetable seedlings!
Next up is the planters. Introducing the first LMST freebie, which can be downloaded below, just print out the page, laminate it if not printing on card stock, and glue them to the popsicle sticks.

To make the seed packets, you can download the labels below and print onto coloured paper. Then glue to the envelopes. I filled mine with pebbles and glued it shut but depending on the age group of the children in your care, you can use bigger/smaller articles and chose whether to glue it shut or not.
Add a couple of child sized gloves, a watering can, some small gardening tools and there you have it - garden sensory box! Don't forget to grab some small pebbles or coloured sand for your 'dirt'.
The final product looked great in the room and the children loved it! It was super easy to put together and was an opportunity to recycle some of our household waste. It was a perfect opportunity to link to my AT's learning focus and I am so happy with how it all turned out.
As for the children; loved it! Bringing the dirt and nature into the classroom really opened up the chance for them to get excited about planting our veggie garden and adding some greenery to our playground. The biggest hit has been the gloves but since there is two chairs at the table and to gloves, some opportunities here to practice their sharing skills. The amount of collaborative work that happens at this station is phenomenal!
As promised, you can download the templates below, the very first LMST free download with only more to come!
Sunday, 20 April 2014
Placement - Planned Experiences Part 1
Dinosaur Fossils
The children in the kindergarten room absolutely love dinosaurs at the moment! We were lucky enough to have an incursion from Dinosaur Diggers (will hear more in a future post!) which has only served to increase their interest and so my associate teacher included the following environment to the room. By adding the sifter and the plastic fossils, the children are now able to dig for their own fossil but I thought we could peak their interest just a little bit further.
I read this post while perusing Pinterest and thought it would be perfect to implement in the afternoon. The children love to bake cakes and cupcakes so experiencing these concepts with the idea of dinosaur fossils worked really well. I followed the recipe for the salt dough featured on RainyDayMum:
Salt Dough
1/2 Cup of Salt
1/2 Cup of water
1 Cup all purpose (plain Flour)
Mix the above ingredients together and knead to a smooth dough and leave in a cool place for around 15 minutes. This will make it easier to roll and create a good imprint in the dough. To cure and harden the dough, bake for one hour at 100 degrees Celsius.
Following us making the dough together, we rolled the dough and pressed our fossils imprints in. After labeling and wrapping the dough, I took it home to bake. It turned out great; the brown colour and grainy texture has them looking like real fossils, straight out of the ground!
I haven't decided yet whether we should paint them due to the unique texture and colour but following the return to their creators, we will see what they want to do.
This was such a fun experience which had so many different forms of learning and play happening that I hope you choose to share this with the children in your care.
Miss Tracy xx
Sunday, 9 February 2014
Assignment File - The Grammar Booklet
Hi all,
I completed a lot of assignments last year but this one was one of my favourites, which is saying a lot! The task was to complete a set of concept maps for a list of grammatical items we were given.
We were given the list at the beginning of the semester and the due date was set sometime during Week 10, after our vacation week. Each week during our tutorials, a group of 2-3 people would present a short PowerPoint on the grammatical item of the week and we were expected to take notes, ask questions and prepare the appropriate mind-map in our own time.
For our presentation, My partner K and I chose 'Type of Nouns' and rather then a PowerPoint, prepared a Prezi to share with the class. These presentations were worth 10% of our final grade and the both of us walked away with a HD.
We had the choice of how to create our maps and I went with Lovely Charts. I had used the online program in high-school on a PC; I loved how clean and professional the final product looked without using default fonts like Times New Roman and Verdana. So when I revisited their site and saw that they had an app, I looked into it. Now usually I only go for free apps, but at $5.50 I knew how good this program was and happily clicked 'buy now'.
The app is painfully easy to use and the part is its save function; you can email the diagram to yourself in a variety of formats. The only limitation I found with the app was the color schemes available; while there a plenty of nice colours there, I would have liked to be able to customise and mix the schemes. Besides that, use your fingers to draw shapes, use two finger to connect shapes and one finger to drag. There it is, painfully simple!
The original idea I had was to do two mind maps a week when I had the time but as things worked out, I majority of the work until the vacation week. Luckily I finished and had about 17 mind maps at the end of my ordeal which looked something like the one below...
But creating countless mind maps was not enough for my tutor, we had to make a grammar BOOKLET. So off to Officeworks I ran to get this piece of hard work bound. I choose the Pro-Click binding for this assignment as we were permitted to bring this into our exam and had I made a mistake, I would like to have had the option to change my mind map. One of my favourite components of this assignment was the fact that we had to include an acknowledgment thanking our classmates for their input since we used information from others presentations. I was really happy with my final product and thankfully, so was my tutor which reflected in my mark, another HD!
Miss Tracy xx
We were given the list at the beginning of the semester and the due date was set sometime during Week 10, after our vacation week. Each week during our tutorials, a group of 2-3 people would present a short PowerPoint on the grammatical item of the week and we were expected to take notes, ask questions and prepare the appropriate mind-map in our own time.
For our presentation, My partner K and I chose 'Type of Nouns' and rather then a PowerPoint, prepared a Prezi to share with the class. These presentations were worth 10% of our final grade and the both of us walked away with a HD.
We had the choice of how to create our maps and I went with Lovely Charts. I had used the online program in high-school on a PC; I loved how clean and professional the final product looked without using default fonts like Times New Roman and Verdana. So when I revisited their site and saw that they had an app, I looked into it. Now usually I only go for free apps, but at $5.50 I knew how good this program was and happily clicked 'buy now'.
The original idea I had was to do two mind maps a week when I had the time but as things worked out, I majority of the work until the vacation week. Luckily I finished and had about 17 mind maps at the end of my ordeal which looked something like the one below...
But creating countless mind maps was not enough for my tutor, we had to make a grammar BOOKLET. So off to Officeworks I ran to get this piece of hard work bound. I choose the Pro-Click binding for this assignment as we were permitted to bring this into our exam and had I made a mistake, I would like to have had the option to change my mind map. One of my favourite components of this assignment was the fact that we had to include an acknowledgment thanking our classmates for their input since we used information from others presentations. I was really happy with my final product and thankfully, so was my tutor which reflected in my mark, another HD!
Miss Tracy xx
Posted by
Miss Tracy
at
9:00 am
No comments:
Labels
assignment,
book,
did it myself,
download,
EDLA,
first year,
literacy,
literature,
officeworks,
presentation,
prezi,
resource,
university,
where to buy


Wednesday, 5 February 2014
Style File - Polish Perfection
Colour 1 - White Indulge Gift Set Woolworth's Australia
Colour 2 - Clear Indulge Gift Set Woolworth's Australia
Lightly swab your nails with a cotton ball dipped in nail polish. Use colour 1 to highlight your natural nail shape. Repeat when the first coat is dry. When the nail is touch dry, use colour 2 to paint the whole nail and repeat when the first coat is completely dry.
These colours were part of a limited edition Christmas gift set released by Woolworths Australia.
Miss Tracy xx
Posted by
Miss Tracy
at
9:00 am
No comments:
Labels
colour,
did it myself,
instructions,
series,
style file,
teacher fashion,
what I wore today


Wednesday, 29 January 2014
Style File - Polish Perfection
For full opacity, 2 coats are recommended. Wait until the first is completely dry before applying the second coat. The sand effect gives the final product a three-dimensional finish with a multicolour sparkle. Polishes are available from Priceline Australia and can be purchased at $2.75 each.
Miss Tracy xx
Posted by
Miss Tracy
at
9:00 am
No comments:
Labels
colour,
did it myself,
instructions,
series,
style file,
teacher fashion,
what I wore today


Wednesday, 22 January 2014
Style File - Polish Perfection
Colour 1 - Nude by Savvy Designer Brands
Colour 2 - Ginger Ale by Savvy Designer Brands
Start by painting 1-2 coats of colour 1. When dry, top with 1 coat of colour 2 for a subtle glitter as shown in the picture, or two coats for maximum coverage. Both polishes are available from Priceline Australia and can be purchased at $1.00 each.
Miss Tracy xx
Posted by
Miss Tracy
at
9:00 am
No comments:
Labels
colour,
did it myself,
instructions,
series,
style file,
teacher fashion,
what I wore today


Subscribe to:
Posts (Atom)